10b. OUTPUT screen: WARP, masks and SOFT EDGE BLEND
Continues page 10a — geometric calibration and color for the selected slice: warping for the lens and the screen, masks, stitching neighboring projectors and the slice's own color.
WARP and SLICE WARP
Warping is built from layers. The WARP section in the screen card on the left bends the whole output, the SLICE WARP section in the slice card on the right bends only that slice; every slice has its own stack, so several slices of one display are warped independently. The + LAYER ▾ button adds a layer: 4POINT (four corners — perspective correction and simple keystone), 9POINT, CUSTOM, GRID (a grid of nodes), CIRCULAR, LENS DEFORM; the screen's WARP also has REFERENCE. Layers apply top to bottom (TOP APPLIED FIRST): the checkbox turns a layer off, ↑ ↓ change the order, × deletes. The EDIT POINTS button (POINTS for a slice) shows the selected layer's points on the canvas of the OUTPUT TRANSFORMATION tab, DRAW ON OUTPUT (ON OUTPUT for a slice) draws them directly over the live picture of the physical output. Slice points are set as fractions of its rectangle before rotation — rotating the slice does not move them. While the slice points are open, its position, size and rotation handles are hidden.
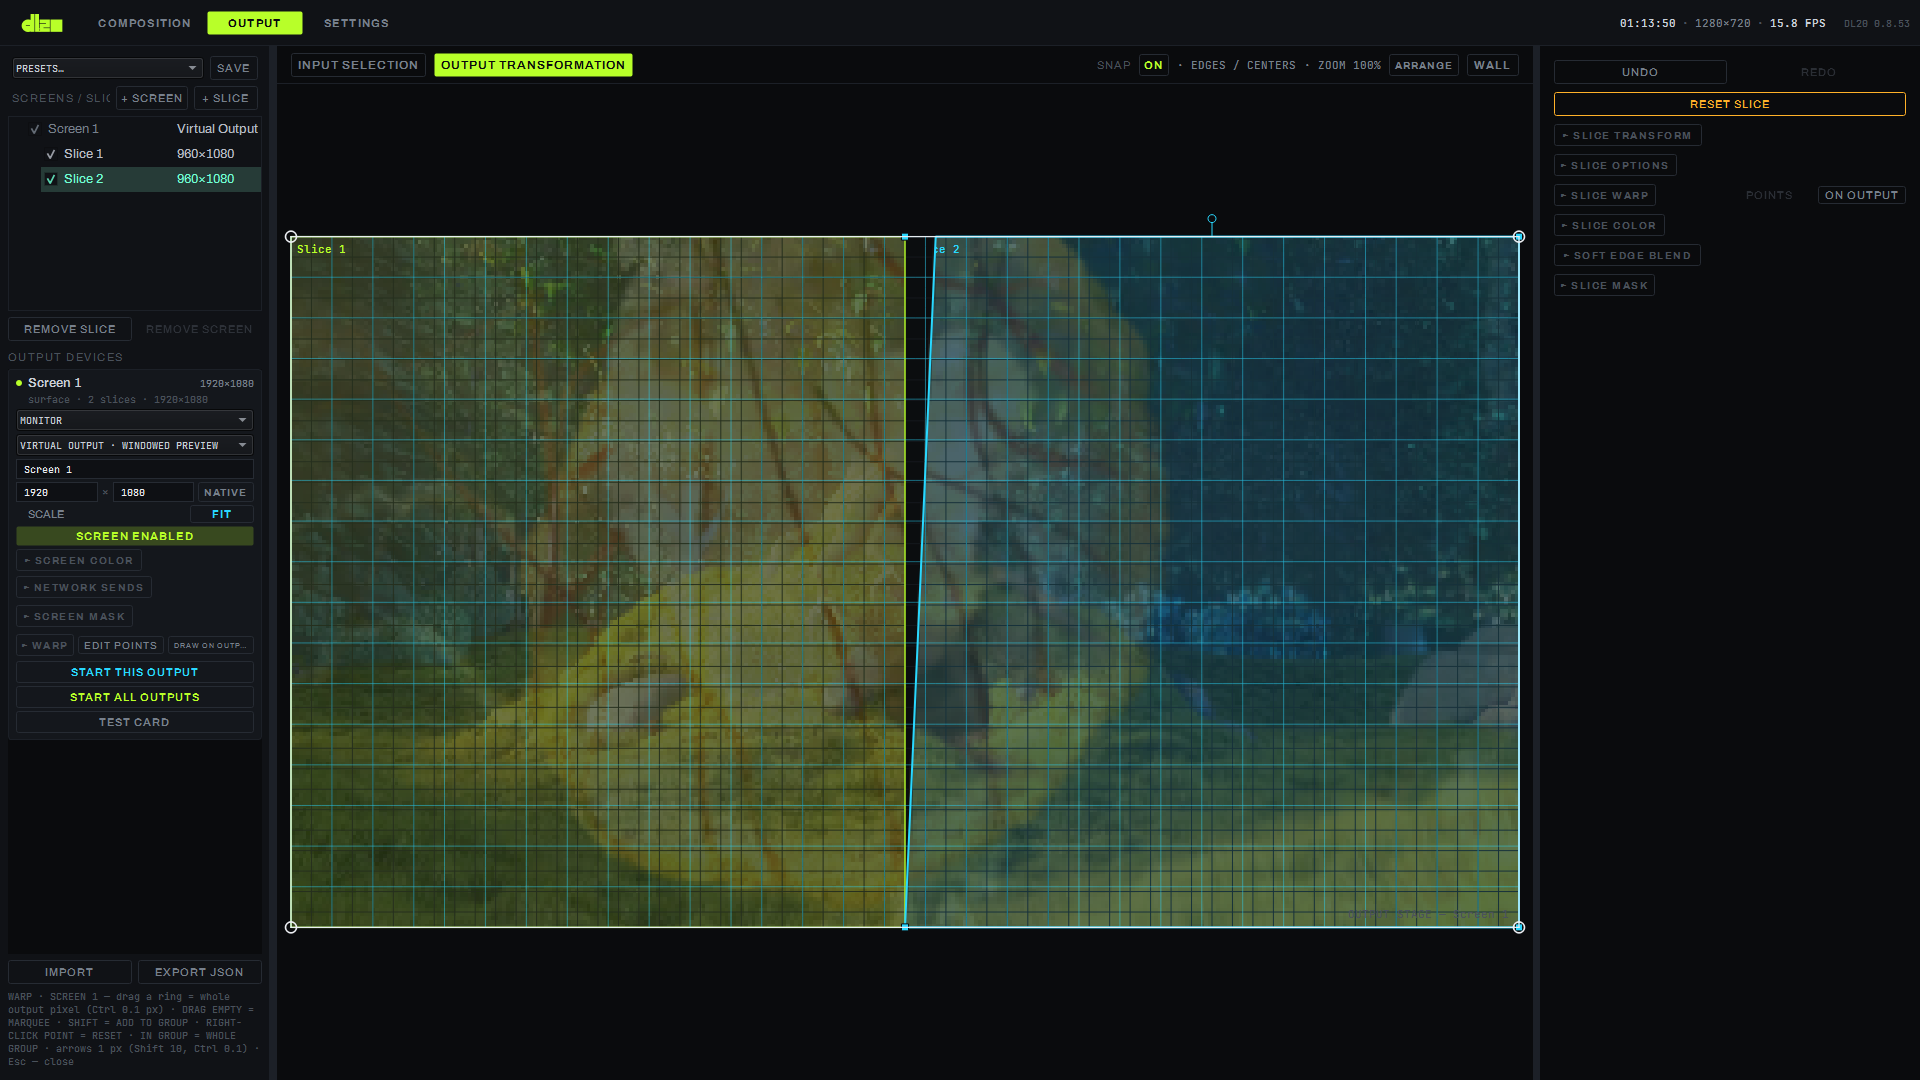
Slice operations — adding a slice, duplicating and moving it to another screen — close (commit, not cancel) an open mask or WARP / SLICE WARP point editing session on the active slice as their very first step: edits do not silently carry over to a copy or to a new slice with the same number.
SLICE MASK and SCREEN MASK
A mask is a polygon from 3 to 32 vertices with a soft edge and inversion; each slice has its own SLICE MASK (in the slice card), the screen as a whole has its own SCREEN MASK (in the screen card), both work the same way. The outline is drawn as a paired contour (outer/inner) directly on the canvas; until it is created, the field shows "NO MASK", the create button places a starting rectangle at 0.25…0.75 of the frame. The EDIT / INVERT / SMOOTH / POINTS buttons control the outline; GAMMA and a field in pixels set the edge softness, UNIFORM FEATHER gives the same feather all along the outline.
SOFT EDGE BLEND and AUTO BLEND
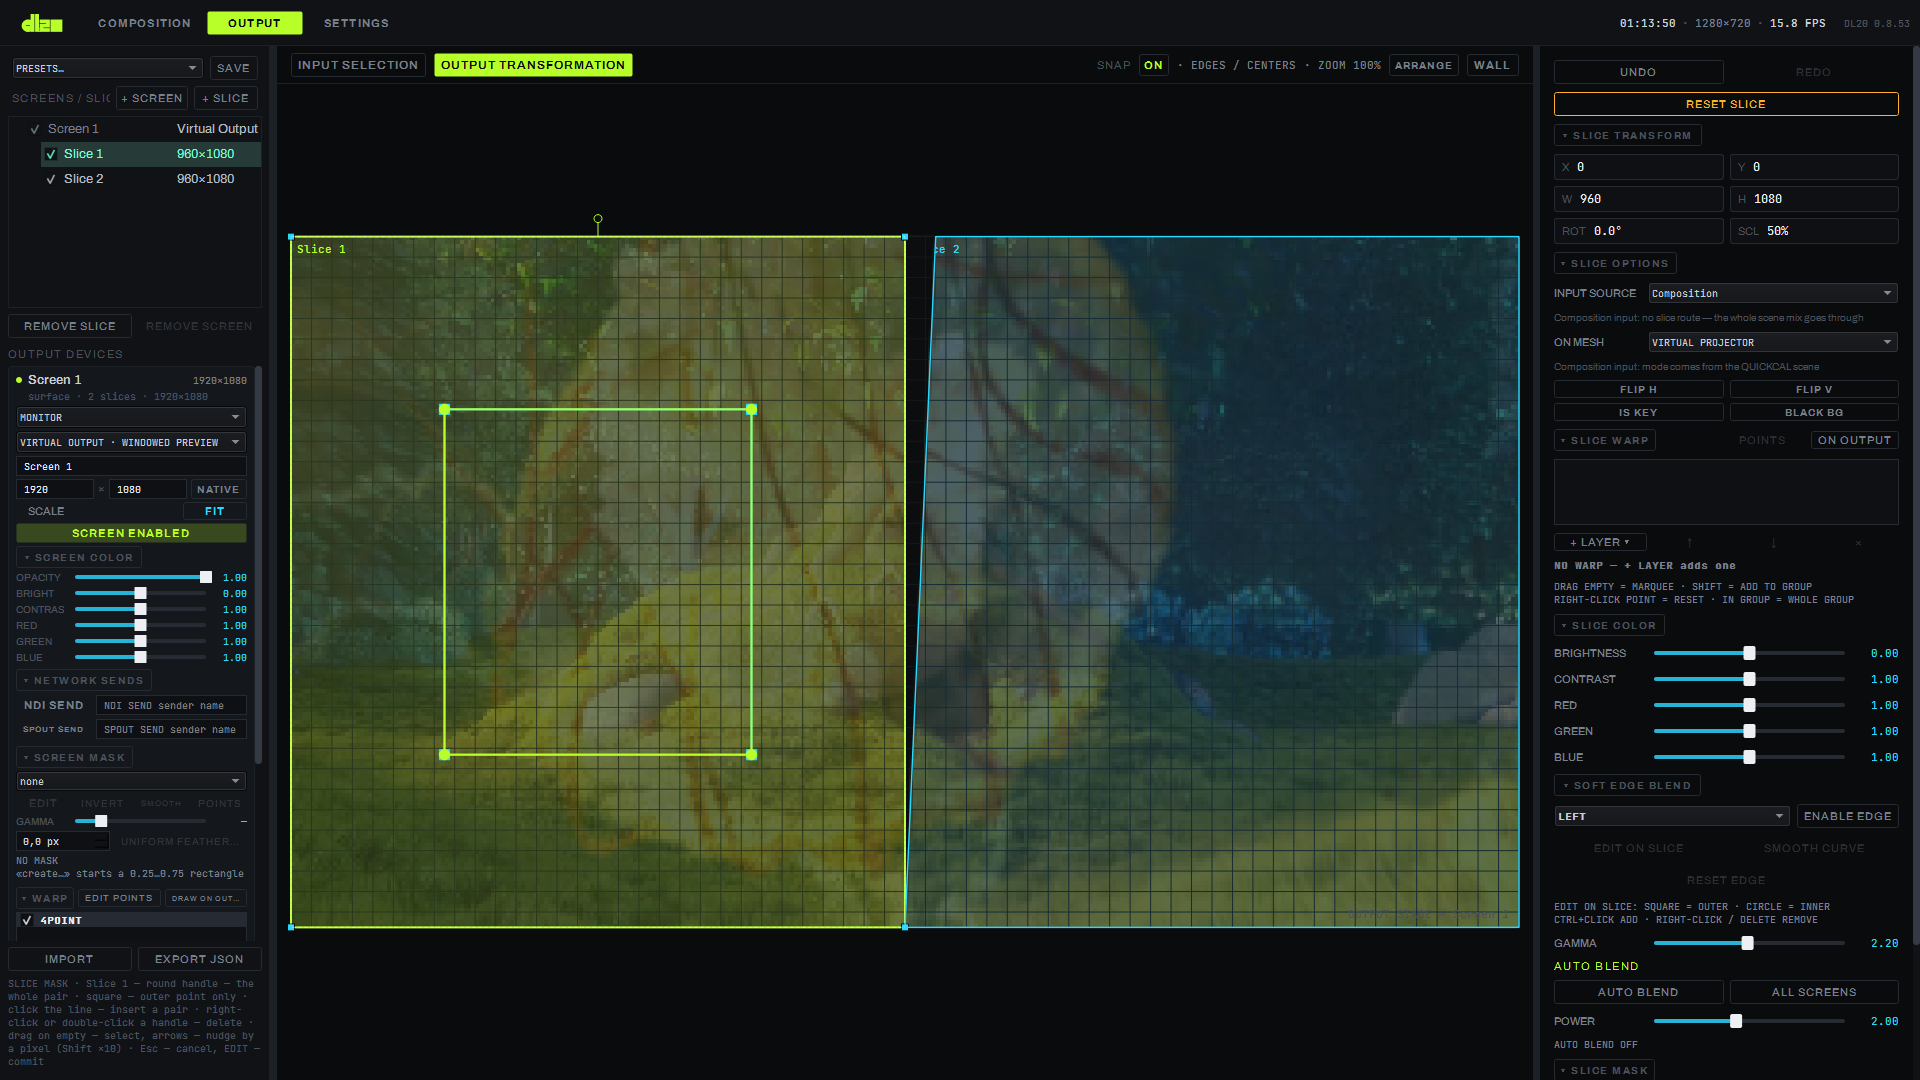
SOFT EDGE BLEND — stitching neighboring projectors along an edge: pick a side of the slice (LEFT / RIGHT / TOP / BOTTOM), ENABLE EDGE turns on a ramp on that side, GAMMA sets the curve's shape (the sum of the projectors' light in the overlap zone equals 1 at gamma 2.2), EDIT ON SLICE edits the ramp directly on the canvas, SMOOTH CURVE smooths it, RESET EDGE returns it to a straight line.
AUTO BLEND resolves overlaps automatically from a map of slice overlaps: the AUTO BLEND button computes the blend for the selected slice, ALL SCREENS — for all slices of the project at once, the POWER slider sets the curve's exponent, the status line shows the number of slices, overlaps and the sum of light in the overlap zone. For a classic layout — a cross of four projectors or a 2×2 wall — the light sum's deviation from the ideal does not exceed 0.005, against 0.96 for manual edge stitching.
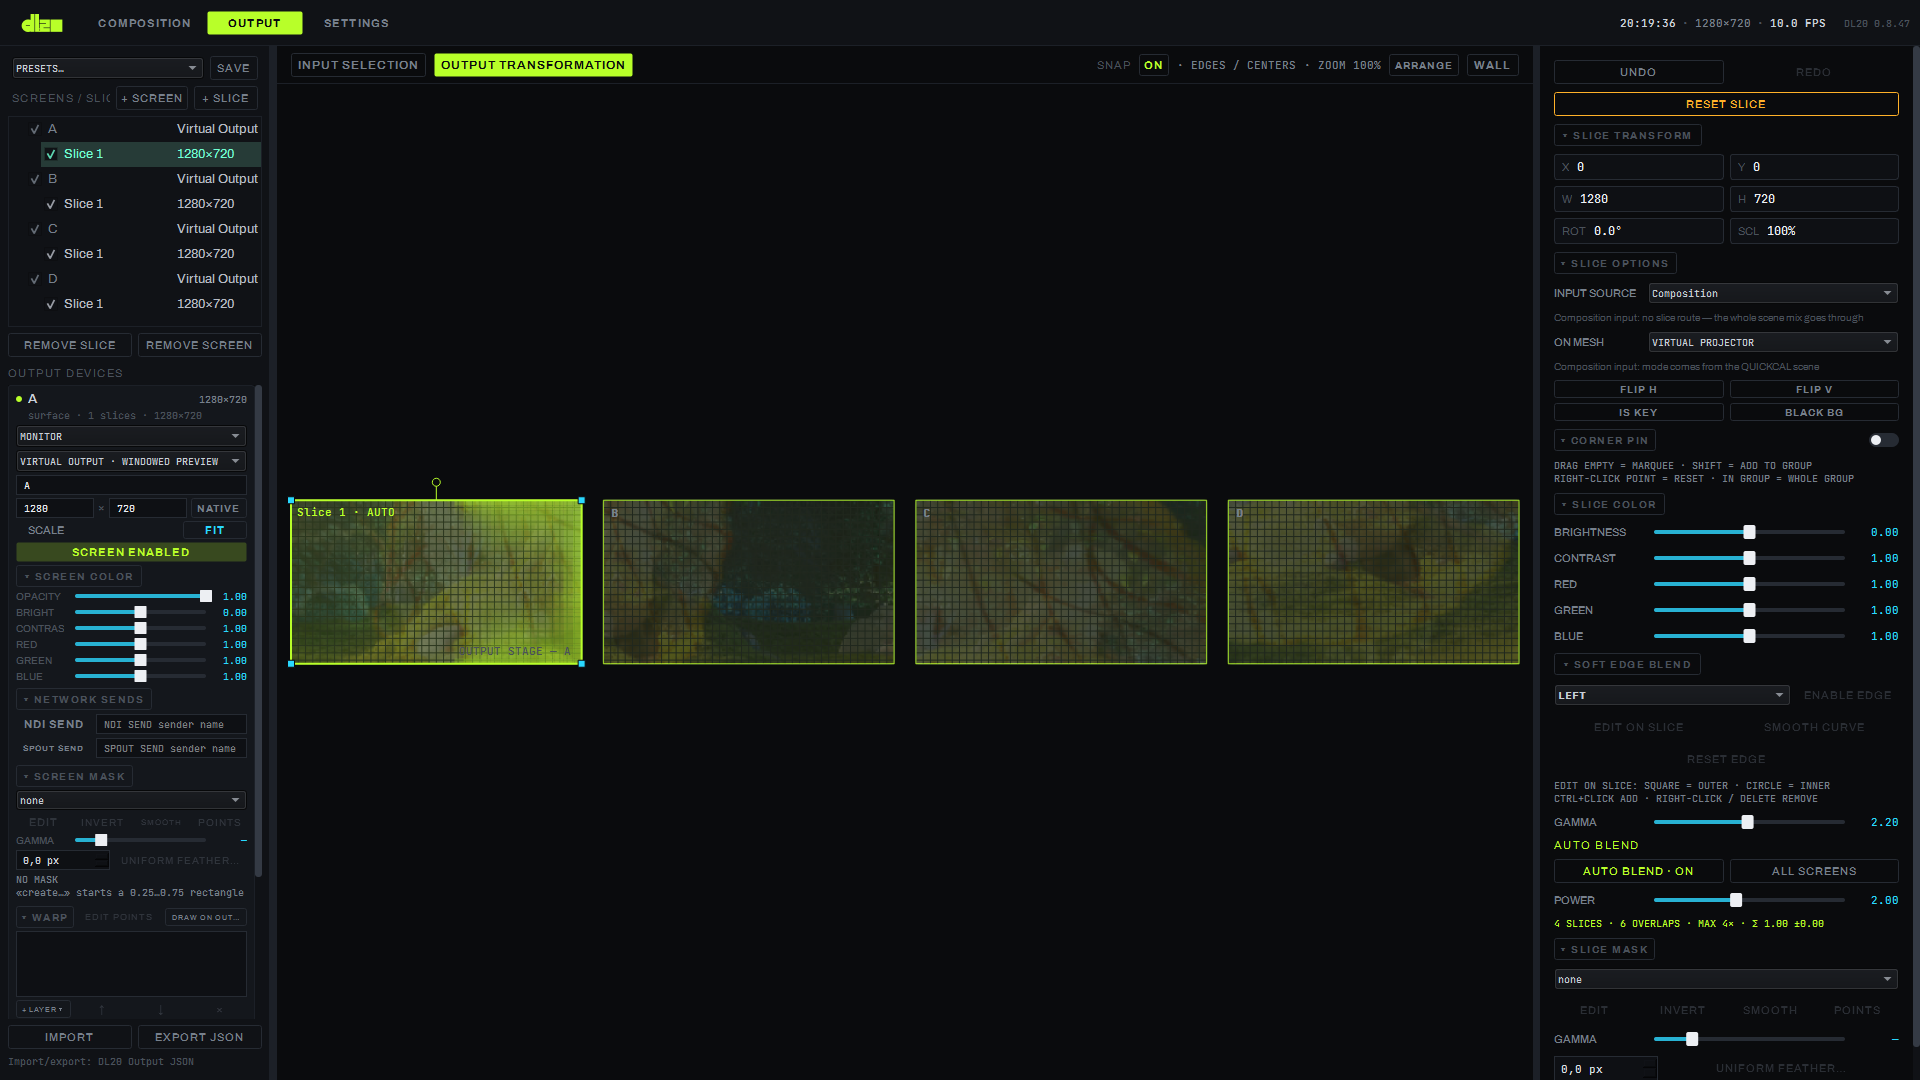
Not solved: the black level in the middle of a seam is not evened out on dark content, and color and brightness matching between projectors is not done — both of these tasks remain with the operator.
SLICE COLOR
The color of the slice itself, separate from the screen's SCREEN COLOR and from the window's COLOR in the clip panel: BRIGHTNESS, CONTRAST, RED / GREEN / BLUE — matching a particular projector or monitor on site.
IMPORT/EXPORT JSON and PRESETS
IMPORT and EXPORT JSON at the bottom of the left column save and load the whole output configuration as a file (DL20 Output JSON) — screens, slices, geometry, masks, blend; exporting and re-importing restore the configuration bit for bit. PRESETS at the top of the column — a list of saved output layouts inside the project itself, the SAVE button next to it saves the current one.
Parameters
| Parameter | Values |
|---|---|
| WARP / SLICE WARP layers | 4POINT, 9POINT, CUSTOM, GRID, CIRCULAR, LENS DEFORM; REFERENCE — screen WARP only |
| GRID layer | up to 64×64 cells |
| Mask | 3–32 vertices, soft edge, inversion; one outline per slice/screen |
| SOFT EDGE BLEND, gamma | light sum = 1 at γ 2.2 |
| AUTO BLEND, deviation | ≤ 0.005 (manual-path baseline 0.96) |
| SLICE COLOR | BRIGHTNESS, CONTRAST, RED, GREEN, BLUE |
| Export/import | JSON, bit-for-bit round trip |
Limitations
- A mask is a single outline (outer/inner) per slice or per screen; several outlines with KEEP/CUT modes and a mask from a PNG file are not implemented in this version.
- AUTO BLEND does not even out the black level in the middle of a seam on dark content, and does not match the color and brightness of different projectors with each other.