10a. OUTPUT screen: screens and slices
The OUTPUT screen assembles the composition into what the audience actually sees: one or several physical outputs, each with its own geometry, cropping and color correction. The model follows the Resolume family of programs: up to 64 screens (Screens), each with one or more slices (Slices) with separate geometry on the input side (INPUT SELECTION — what to take from the composition) and on the output side (OUTPUT TRANSFORMATION — where to put it). A screen is a device of one of three types: MONITOR (a projector or display — this page), DMX LUMIVERSE and VOLUMETRIC (LED fixtures and LED volume — page 11). The composition is rendered once, no matter how many outputs there are.
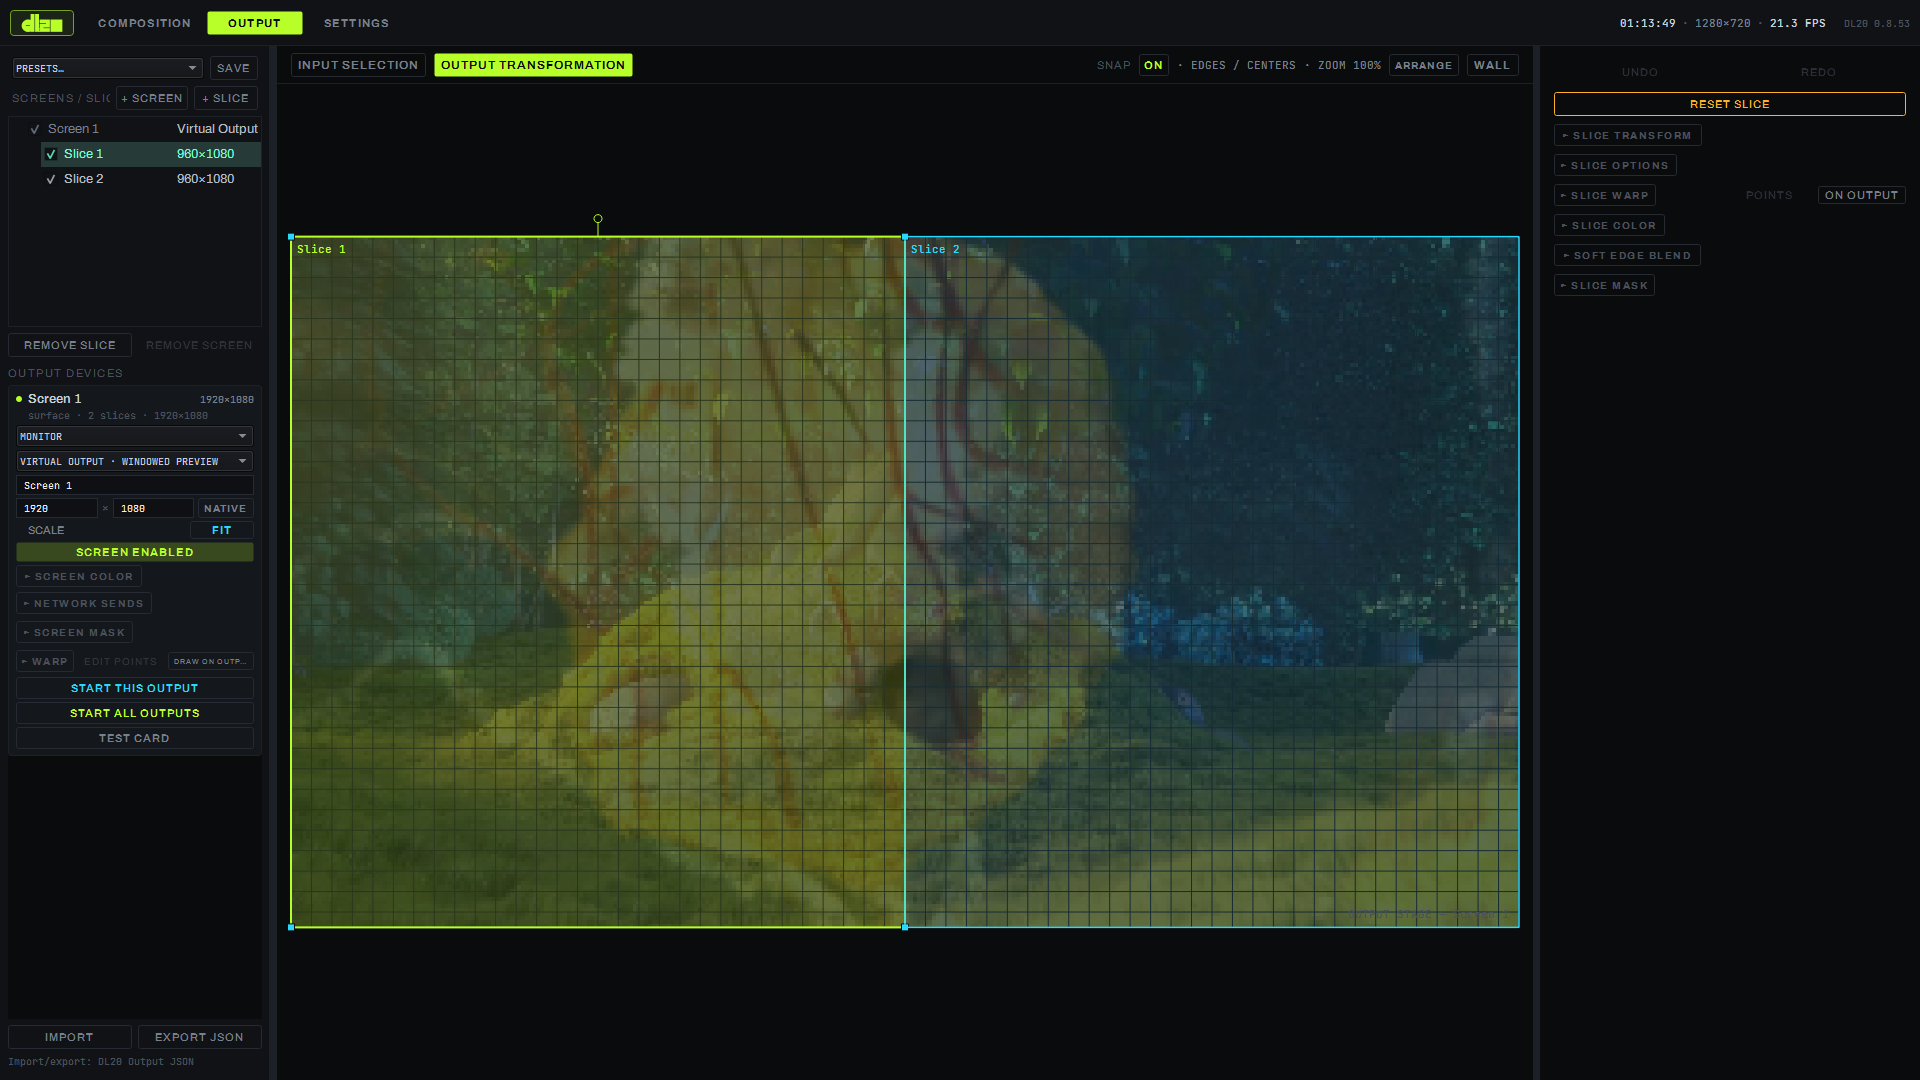
Screens and slices
The SCREENS / SLICES list on the left is a tree: screens, each with nested slices, the selected row highlighted. + SCREEN adds a new screen with one slice covering the whole frame, + SLICE places one more slice on the selected screen. REMOVE SLICE and REMOVE SCREEN below the list remove the selected row. The checkbox to the left of a row's name is a quick enable/disable, separate from SCREEN ENABLED in the card itself.
Screen card
The card on the left holds the settings of the selected screen (OUTPUT DEVICES):
- device type — a dropdown list MONITOR / DMX LUMIVERSE / VOLUMETRIC;
- display binding — a list of the machine's physical displays (the first in the list is the primary one), the NATIVE button sets the resolution fields to the selected display's native resolution;
- the screen name as a text field, resolution as two numeric fields;
- SCALE — FIT (fit without cropping) or STRETCH (stretch to the sides);
- SCREEN ENABLED / SCREEN DISABLED — turns the screen on in the show;
- ▸ SCREEN COLOR — brightness and contrast of the whole screen output;
- ▸ NETWORK SENDS — the NDI SEND and SPOUT SEND buttons, each with its own stream name field; what goes out over the network is the assembled screen output — with warp, blend and mask applied, not the raw composition; the monitor, NDI and Spout work at the same time. NDI delivers 8-bit RGBA/UYVY or 10-bit P216, straight from the 16-bit pipeline, without quantizing;
- ▸ SCREEN MASK and ▸ WARP — the mask and the geometric correction of the whole screen output, in detail on page 10b;
- START THIS OUTPUT / START ALL OUTPUTS — raise a borderless projection window over the whole display, for this screen or for all of them at once; TEST CARD outputs a test grid instead of the content, without touching the composition itself; IDENTIFY shows the screen's number right on its display. The F10 key temporarily moves the projection to the operator's monitor and back.
The sections of both cards — the screen's on the left and the slice's on the right — collapse with a click on their header and are collapsed again every time the program starts; the EDIT POINTS / DRAW ON OUTPUT buttons in the WARP header and POINTS / ON OUTPUT in the SLICE WARP header stay available even when collapsed. The screen header, the SCALE row and the start buttons are not subject to collapsing.
If the output's display temporarily disappears (sleeps, reconnects) and comes back in the same place, DL raises the output on it again — but only if that place is not taken by the operator's screen or another live output; otherwise the output stays "parked" with a reason shown in the status line.
Canvas: INPUT SELECTION and OUTPUT TRANSFORMATION
The INPUT SELECTION tab shows what feeds the selected slice: layer tiles (their current window or raw layer) and the already assembled screens, with slices overlaid on them as frames — dragging changes the source.
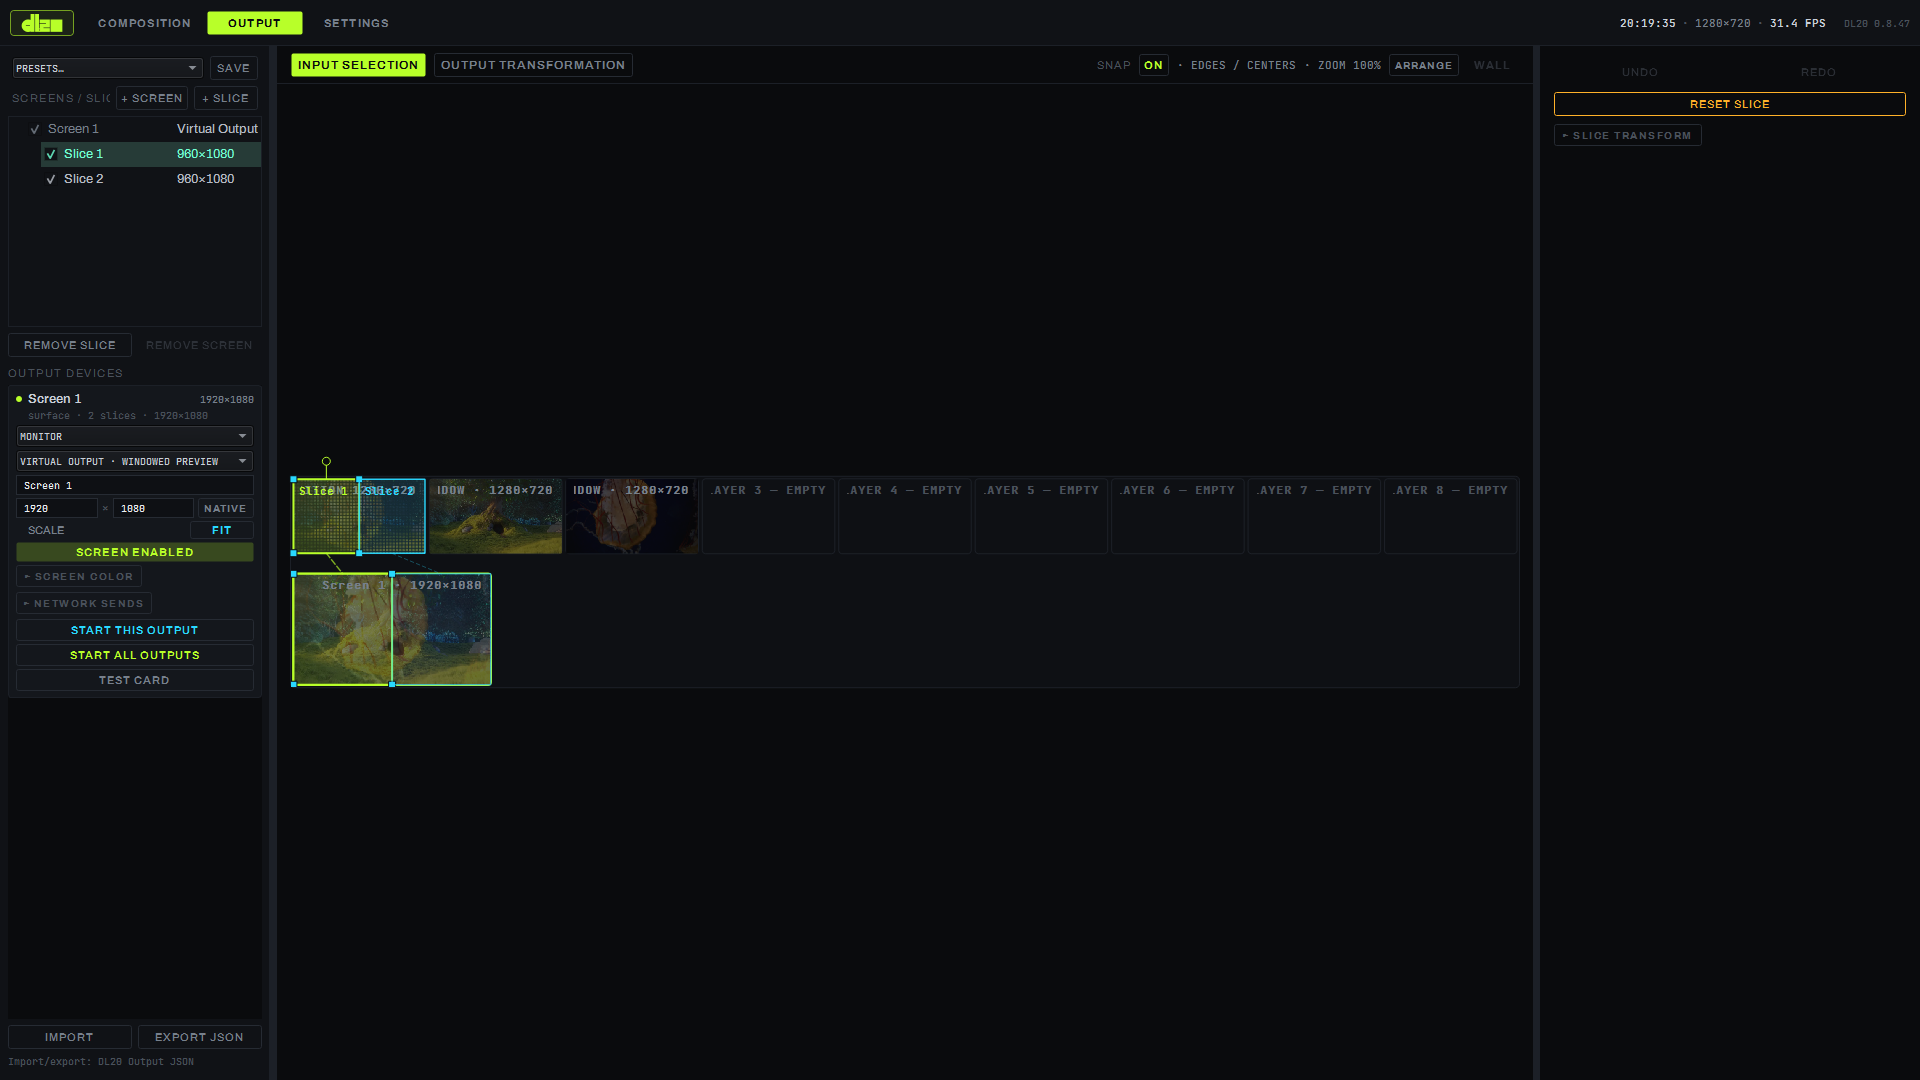
The OUTPUT TRANSFORMATION tab (the default) is the canvas of the output itself: where the slice sits on the physical frame. The toolbar above the canvas is shared by both tabs: SNAP (ON/OFF) pulls a slice's edges and centers to a 32 px grid and to neighboring slices; ZOOM — canvas scale; ARRANGE — an ordinary side-by-side layout of screens; WALL — lays screens out the way their rasters sit on the wall (by INPUT SELECTION), to see the seams for stitching; slices from other screens are visible on it and snap by magnet — the wall is assembled edge to edge from slices of different screens.
Slice card: SLICE TRANSFORM and SLICE OPTIONS
The card on the right holds the settings of the selected slice:
- ▸ SLICE TRANSFORM — position (X, Y), size (W, H) in output-frame pixels, rotation (ROT) in degrees, scale (SCL) in percent;
- ▸ SLICE OPTIONS, the INPUT SOURCE field — exactly what feeds the slice: Composition (the whole scene as the audience sees it) or a specific Layer N — as WINDOW (what is currently playing in the layer's window, with its effects and color) or AS IS (the layer's content directly, bypassing the window); next to it — FLIP H / FLIP V (mirror horizontally/vertically) and the IS KEY / BLACK BG toggles.
A slice routed "as is" (AS IS) does not lose its route on a geometry reset — RESET SLICE only touches the slice's position/size/rotation, the input side stays the same.
How to do it
- Press + SCREEN — a screen with one slice covering the whole frame is added.
- In the screen card pick type MONITOR and a display from the binding list; the NATIVE button instantly fills in its native resolution.
- Turn on SCREEN ENABLED, then START THIS OUTPUT (or START ALL OUTPUTS, if there are several outputs) — the screen expands borderless over the chosen display.
- On the INPUT SELECTION tab drag the layer you need onto the slice, or leave the source as the whole composition — in the slice card, SLICE OPTIONS → INPUT SOURCE.
- On the OUTPUT TRANSFORMATION tab move and stretch the slice rectangle on the canvas, or use the SLICE TRANSFORM fields — SNAP is on by default and pulls the edge to the grid and to neighboring slices.
- Press + SLICE if this same physical output needs one more piece of the composition — the new slice gets its own independent geometry on the input and output sides.
Parameters
| Parameter | Values |
|---|---|
| Screens | up to 64 |
| Screen type | MONITOR / DMX LUMIVERSE / VOLUMETRIC |
| Display binding | list of physical displays, first one — primary |
| Slice snap (SNAP) | 32 px grid, edges/centers of neighboring slices |
| SCALE | FIT / STRETCH |
| NETWORK SENDS | NDI (8-bit RGBA/UYVY or 10-bit P216) and Spout, own stream name |
| Slice INPUT SOURCE | Composition or Layer N (WINDOW / AS IS) |
Limitations
- The composition is rendered by a single video card regardless of the number of slices, screens and outputs — several GPUs do not share the load between them.